
Training

Inside ÿding: Our carbon MTB power meter
Here is the internals of “ÿding”, our new carbon MTB power meter crankset. Build on years of experience with this type of power meters. All the electronics it takes to make a rock solid MTB power meter is in this tiny module. We designed this for an MTB power meter where you want the sensitive electronics well protected. That is why everything is inside the spindle.
This thing is only 10x40mm and has everything needed in a power meter.
This is the electronic module we supply to several brands to make their spindle based power meters. We designed this back in 2016 and have manufactured around 10000 of them. So this is well proven and pretty solid. Seems like we were spot on with the initial design. The only major problem has been a manufacturing issue that caused some units to have too short battery life. This is fixed now and we do not see that issue anymore. For ÿding, we stick with our solid well-proven design and our usual factory in Latvia.
These guys know what they are doing. Highly recommended.
Ask for an intro if you want to manufacture your own electronics there 🙂
The “cigar”
The electronic module goes along with a battery into a plastic holder designed specifically for each brand of cranksets. This can look like this.

When placed inside the plastic holder, this entire “cigar” goes into the center hole of a spindle. The spindle for the MTB power meter is a special version that has strain gauges glued onto it, so it can measure the torque. This glue process is a bit delicate, but there are factories around the world that know how to do this well. We have one place in Asia that we use for this and have been using for a lot of products. We are not going to change that for ÿding.
Waterproofing
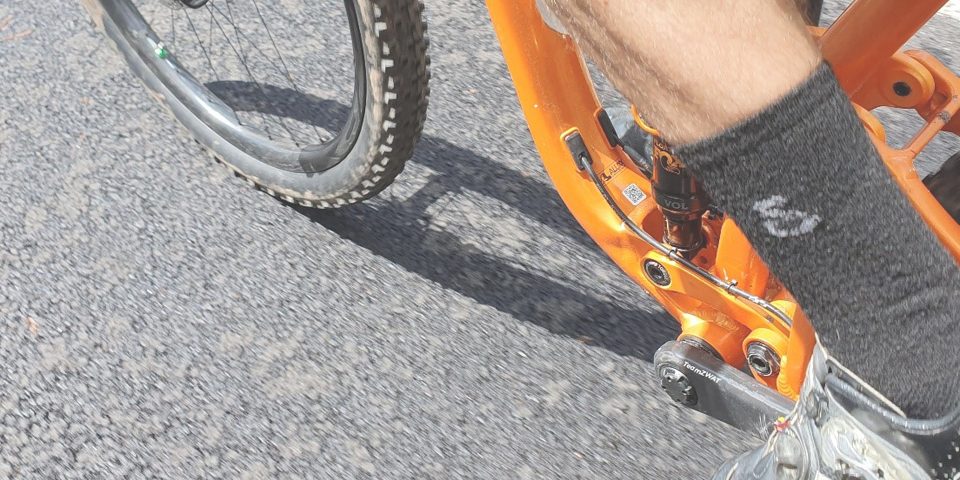
To seal off the spindle for any water etc., a sealing cap goes on in both ends. Only this one is user-removable. This is your access port to the electronics.
You are looking at a prototype here, so the final finish is much better.
Notice the o-ring that keeps this opening watertight. As a user, you may need to remove this cap once or twice per season for charging the battery. The small battery used for ÿding holds power for at least 250h of riding.
The cap can be removed by hand force only, but if it gets stuck a pin-spanner tool may also be used. The 4 holes fit to a common type pin spanner used for other bike parts as well.
Charging
Once the cap is off you have access to the Micro-USB charging port. Use any standard phone charger or even better: a portable power bank. The charging is easily completed within two hours. We do not supply the charger/cable/power bank. Those are readily available in many households already, through your local dollar/euro-store and so many online outlets. The world already has enough of those 🙂

The LED is red when charging and turns off when charging is completed. The power meter is completely powered off when charging, so this is also your “master reset” in case the firmware should lock up for some odd reason.
Normally the power meter will turn on when you spin the crank and stay on as long as it’s being used. The timeout is 5 minutes of no pedaling, whereafter ÿding goes to sleep in order to conserve power.
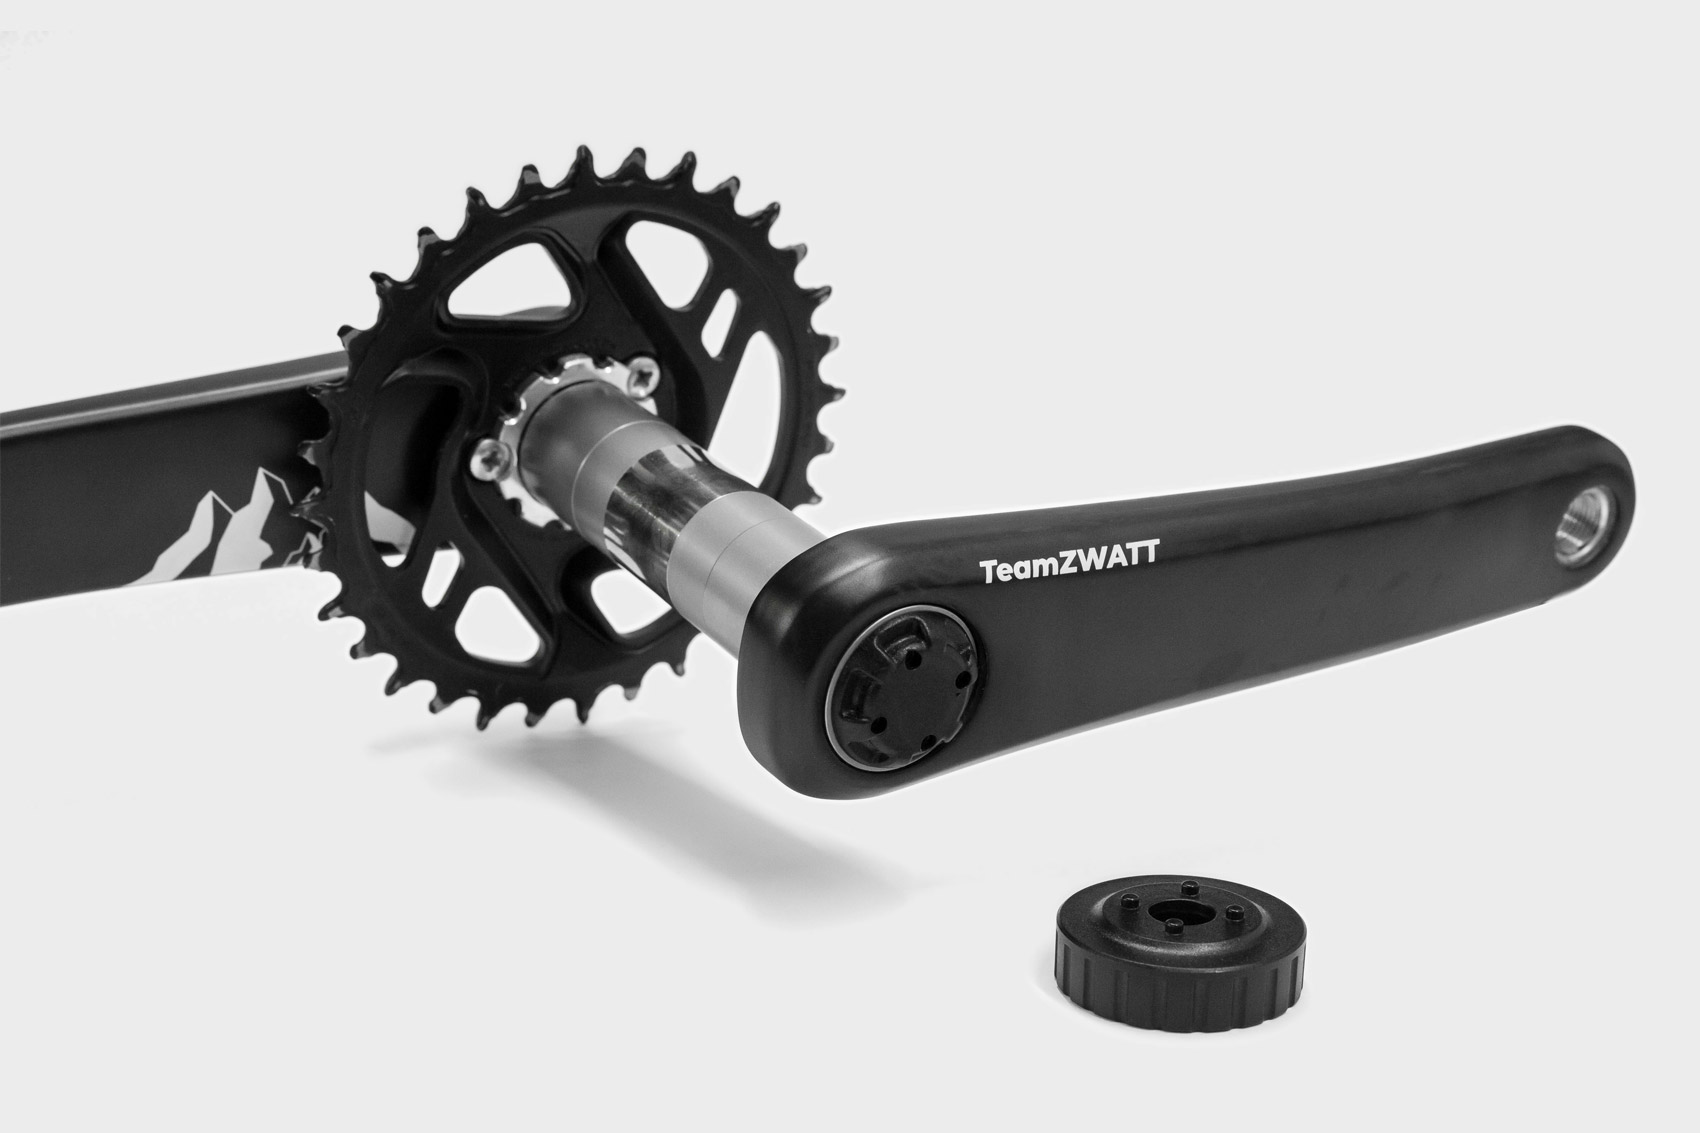
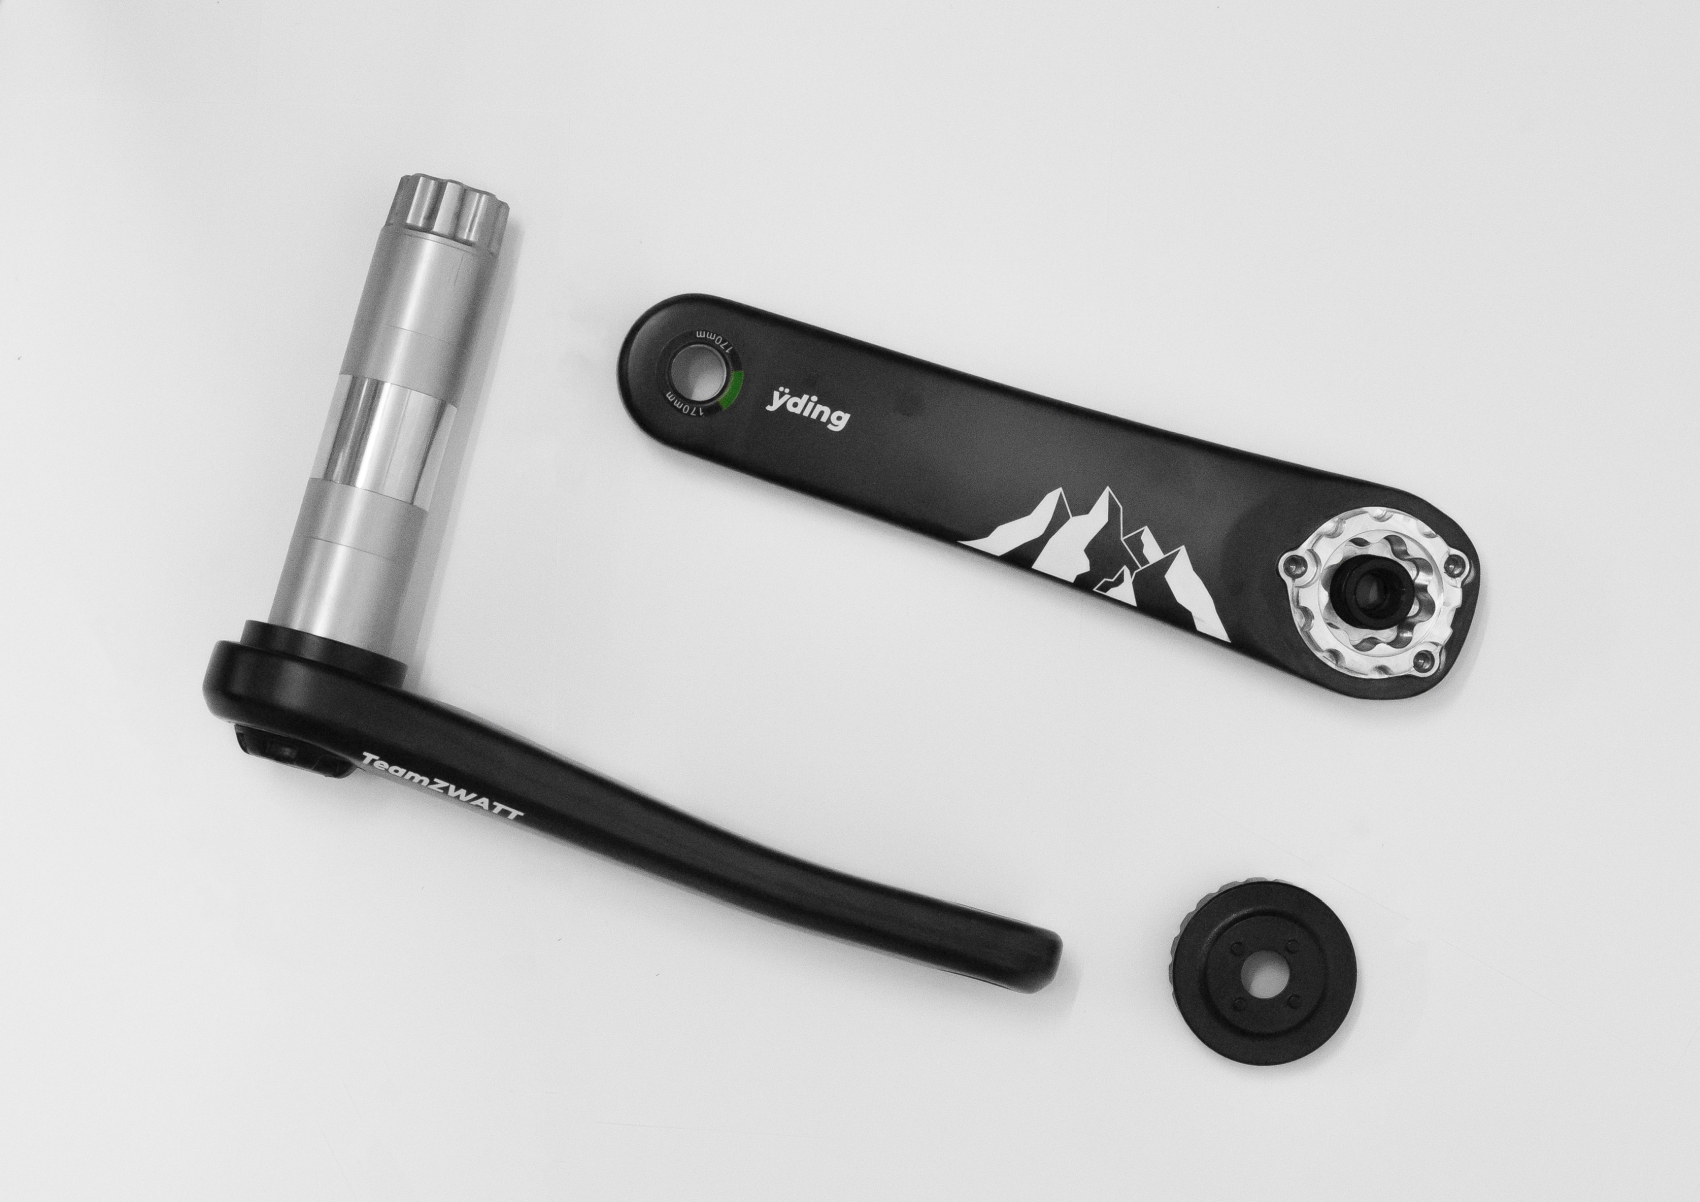
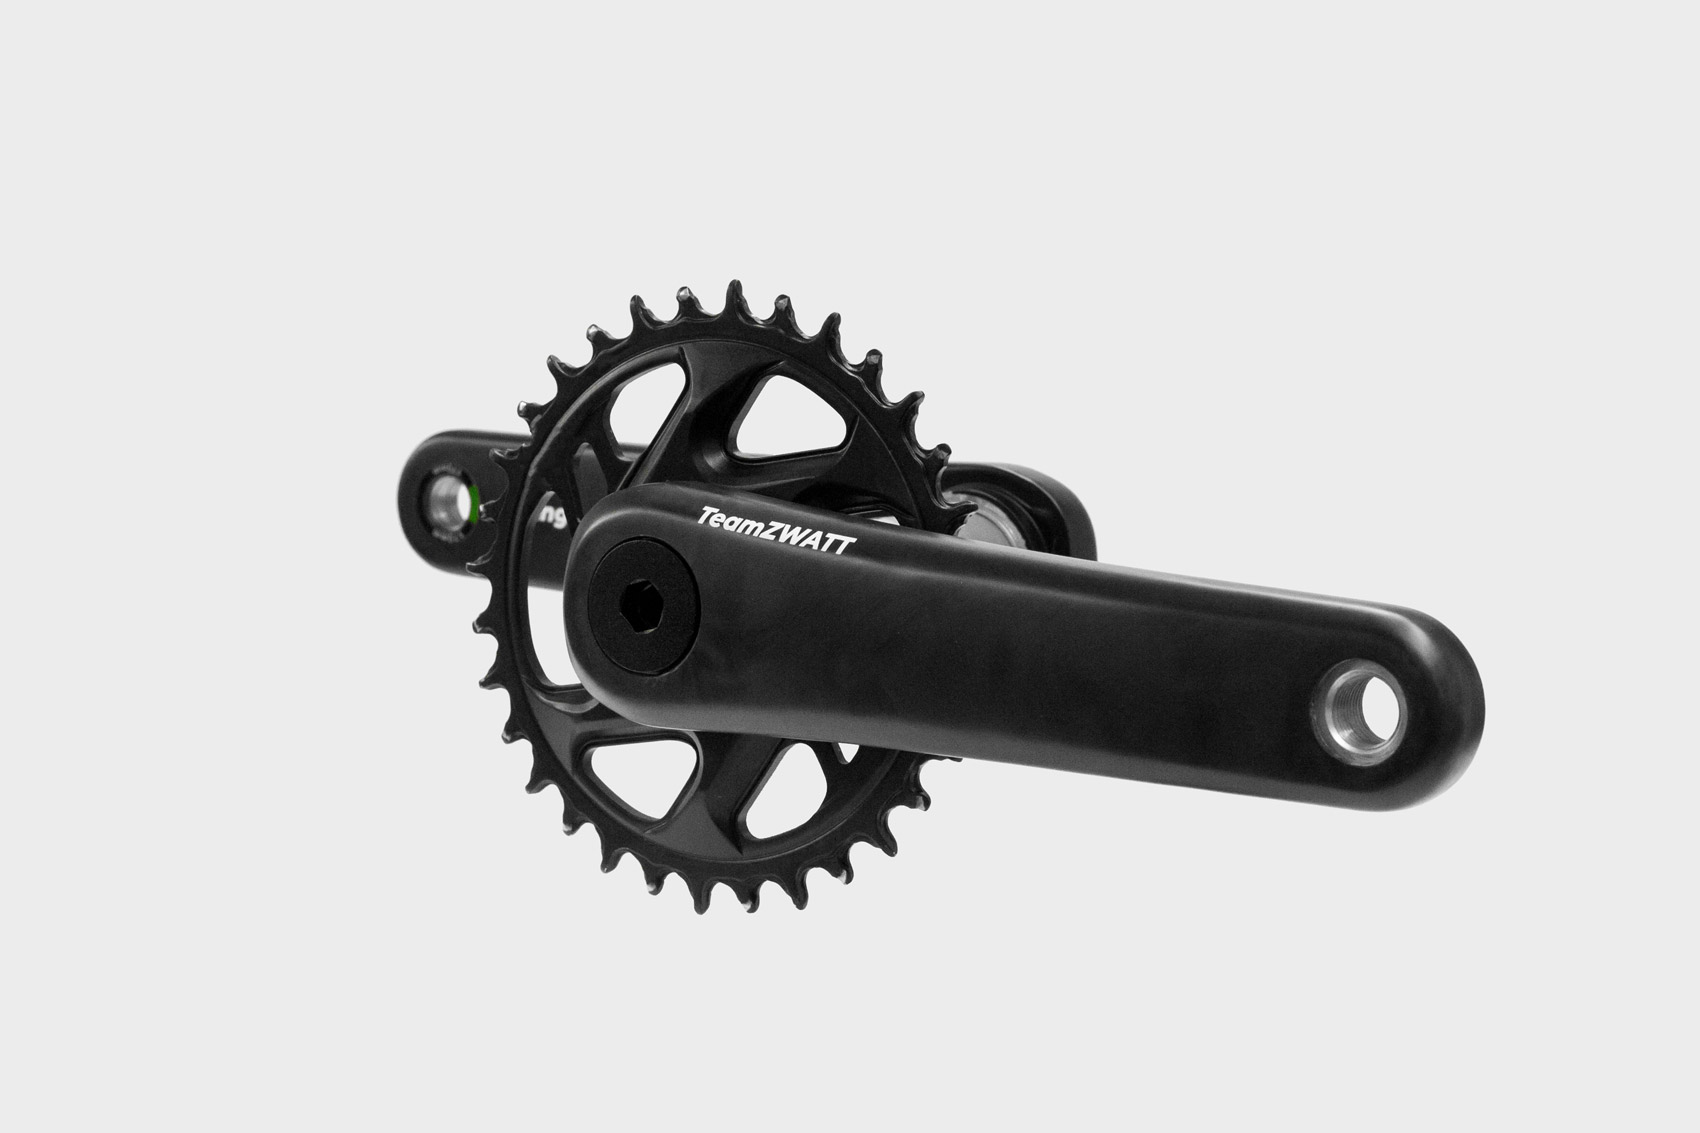
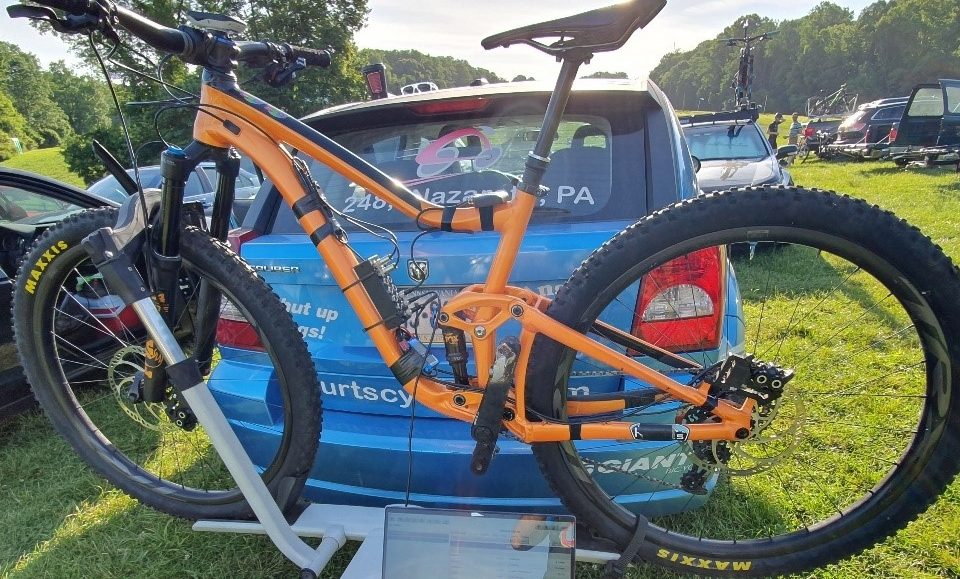
2-piece carbon crankset
We built ÿding on a so-called 2-piece crankset meaning it comes apart in 2 pieces. The left arm is permanently attached to the spindle and the right arm with the chainring is screwed on. This specific crankset is 2nd generation carbon from Samox.
We like Samox because they are constantly investing in new stuff to stay ahead in the bike component market. This is a really competitive market for manufactures in Taiwan fighting to supply cranks, wheels, bars, pedals etc. to the big bike brands. Among others, Samox supplies cranksets to Specialized and we have been very pleased with what we see from them.
Here is a prototype with the electronics installed. This is an early prototype built on a road version of the crankset. Samox makes this series-7 crankset in road, MTB, and BMX versions. For a cross/gravel bike, you will usually want the road version as that is what fits the frame. You may be able to add some spacers and fiddle with the chain line to get the ÿding MTB power meter on a gravel/cross frame also, but it’s not the recommended path.
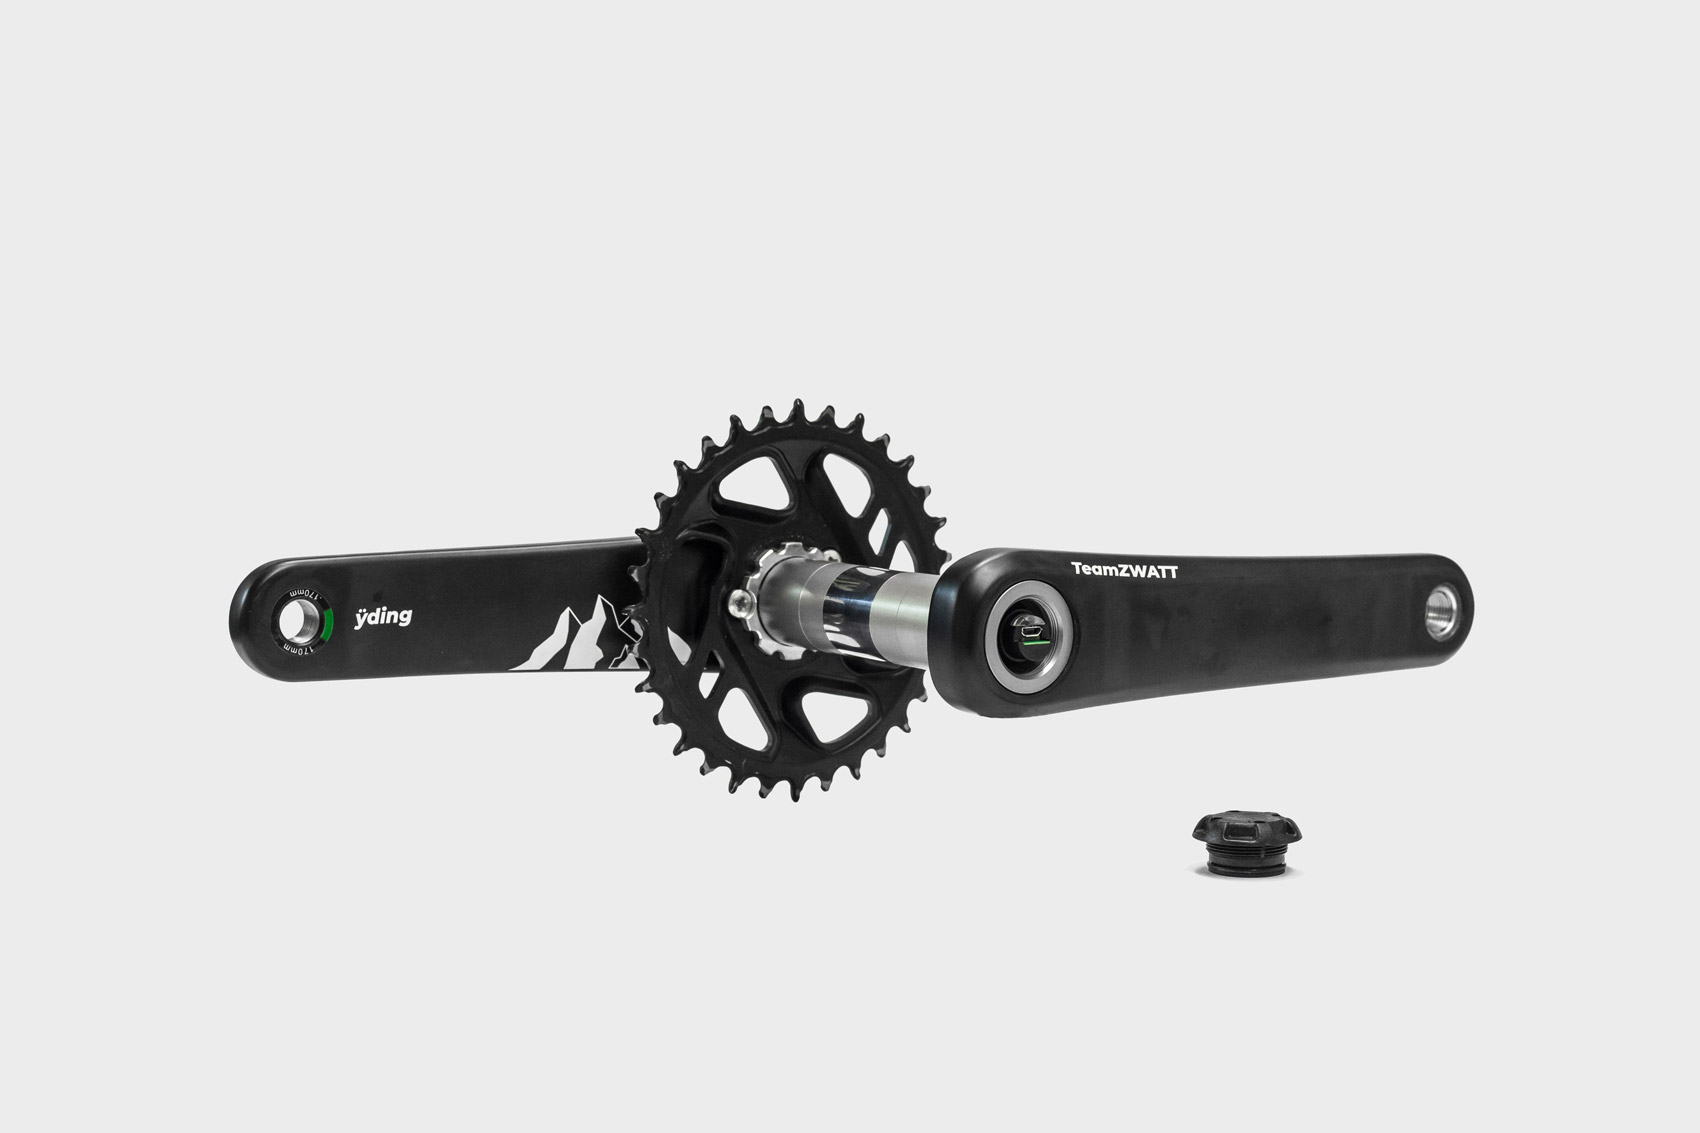
This is a working prototype power meter crankset with electronics installed. Works as it should.
The ÿding will have different graphics and look much nicer 🙂
We have tested this and similar cranksets with the power meter electronics inside many times over the last 3+ years. No surprises have been found in this integration. It’s solid.
Calibration
Once installed in the crankset like this, each ÿding MTB power meter goes through calibration. We have this nice calibration machine that we have sold to some brands also. They use this to calibrate every power meter shipped as one of the last steps of the production line. This takes care of all the small inaccuracies and tolerances, so every power meter comes out with the same accuracy.

The calibration machine is a good test for the power meter as well, as it goes through all of the functions and makes sure everything is working as it should. By having this fully automated test, we can also be sure the results are not too dependent on the actual operator. This is always a key consideration when putting things in production.
Want to see it in action (warning: it’s boring)? Here is an old YouTube video showing it running.
Around November of 2018, we finalized the installation and test-runs for this calibration machine at Samox in Taiwan, so they are now fully trained and capable of doing this at their factory. Here is a shot from the training session we had with Samox.
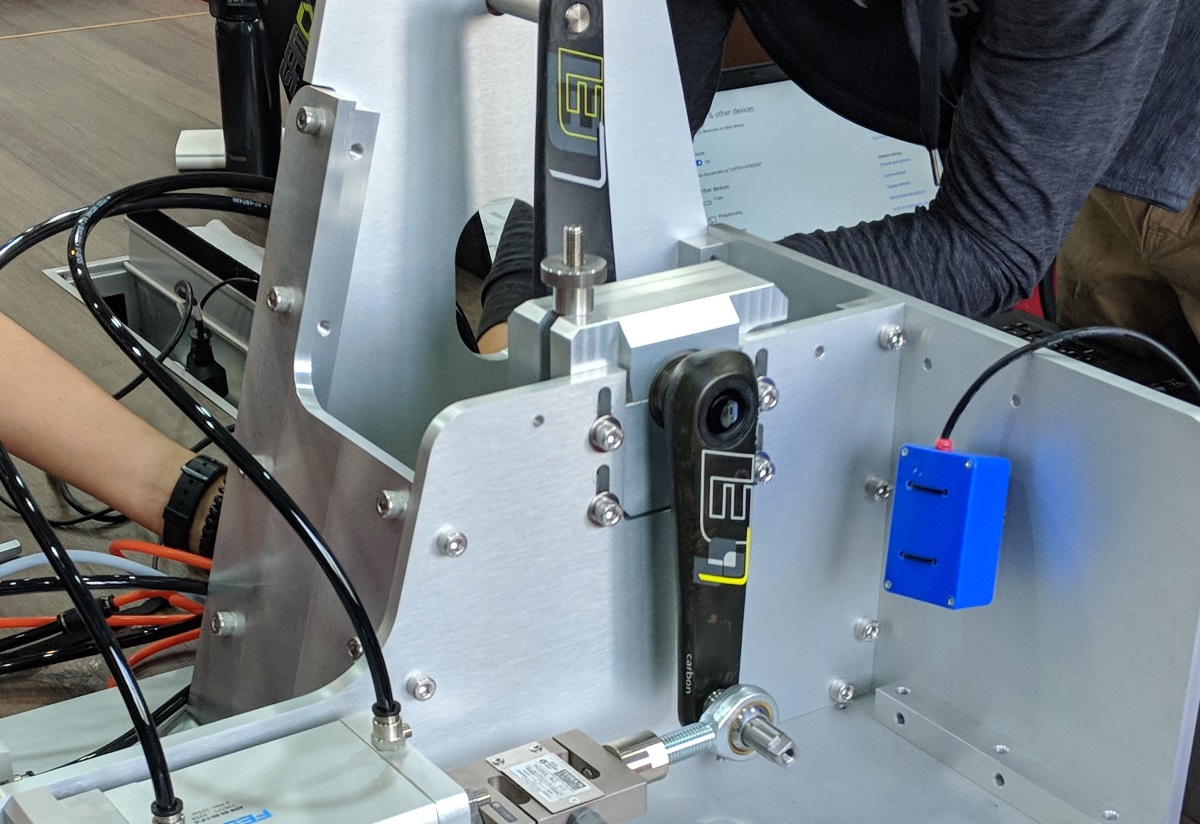
Samox power meter crank in the test and calibration machine in Taiwan.
All in all the manufacturing is set up now for making lots of these power meters at a really good price. With 90% happening in Asia it’s difficult to do this a lot better. You will see more of these power meters come out under different brand names. And now you know how that works.
Installation
Installing ÿding onto your MTB is pretty simple. First off you need to pick the right pieces.
Bottom bracket
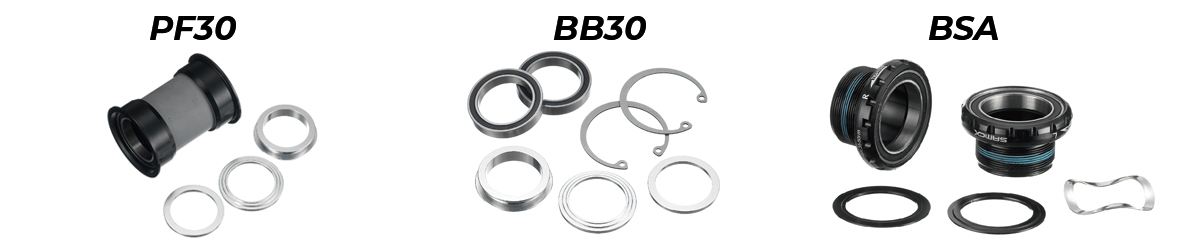
The crankset itself is using a standard 30mm MTB spindle. So you need the right bottom bracket (which is where the bearings are) for this. We know bottom brackets are confusing, but here is an easy overview of the bottom bracket options for MTB.
Chainring
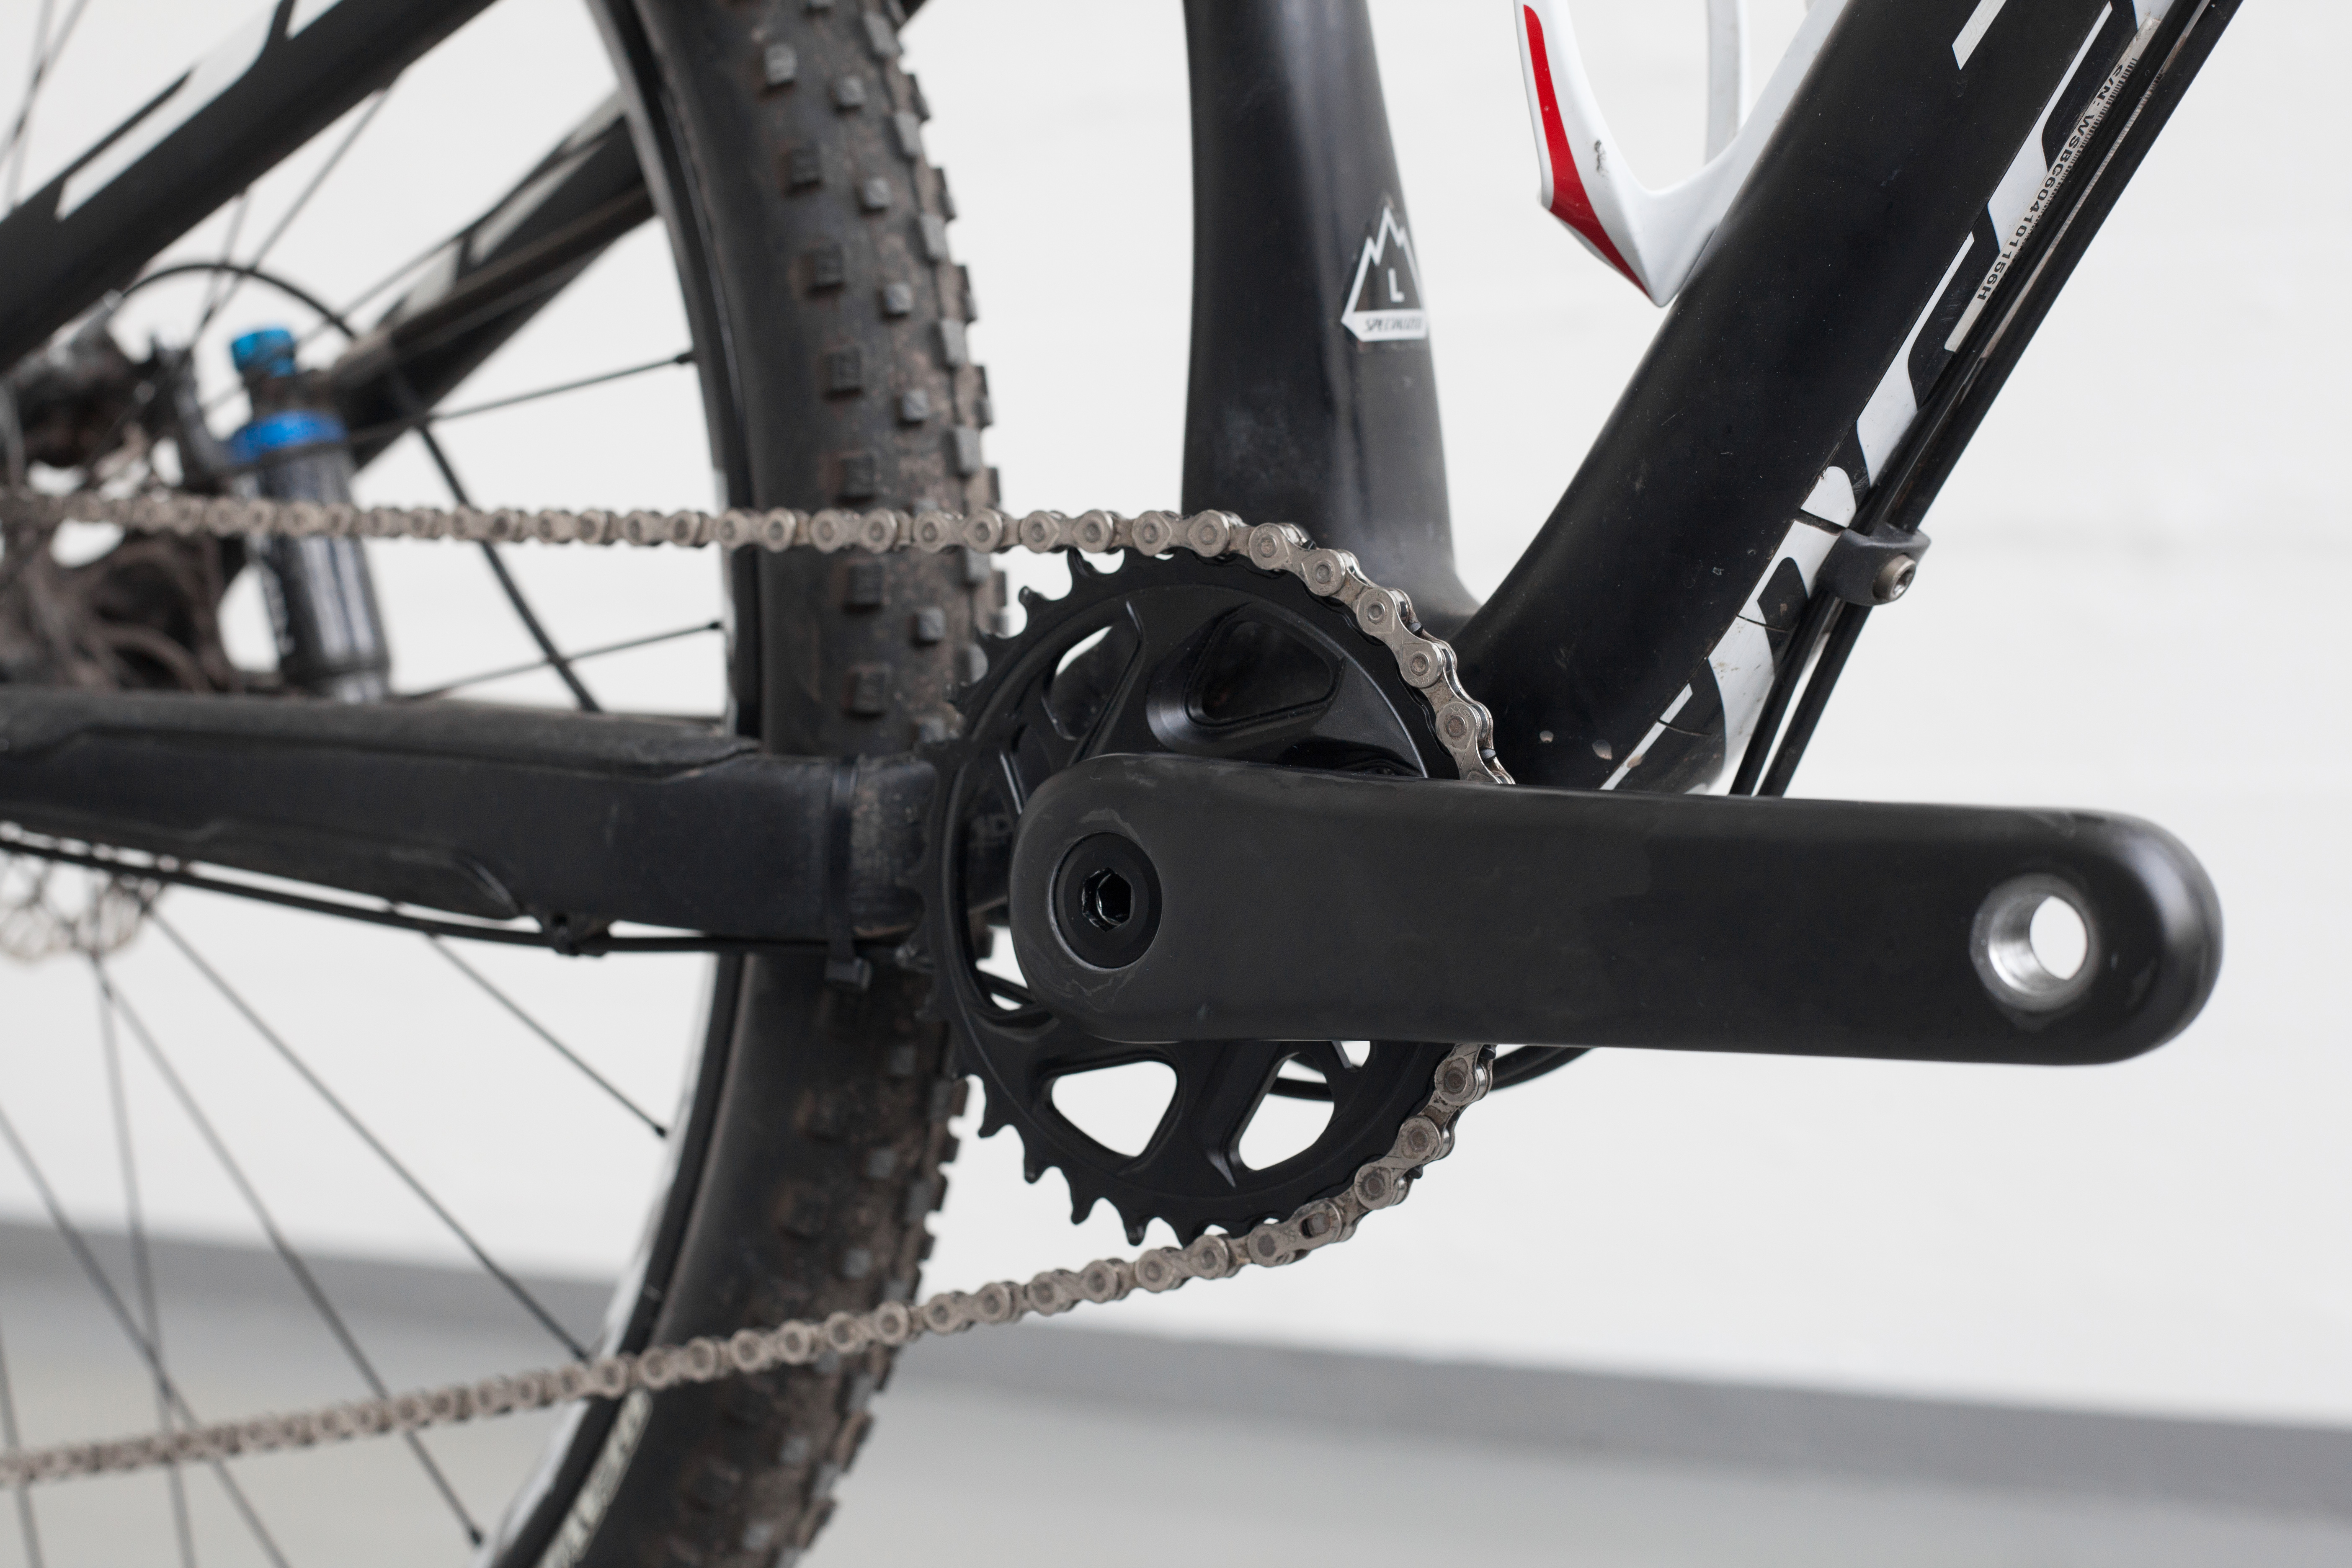
You also need to pick a chainring. In going with the current trend, ÿding is designed for 1x setups where you have only one chainring. But really anything that you can fit onto the “SRAM direct mount” style chainring interface should work. This is how you recognize this.
The chainring simply mounts using the 3 screws shown (use Torx screws if available as this is clearly the best system). You may want to use a bit of Loctite to secure the screws and still be able to unscrew them if you want to switch chainrings some day. The chainring is a so-called narrow-wide style meaning every other tooth is wider. This fits better with the chain and helps the chain stay centered on the chainring even when it’s pulled all the way in or out in the highest or lowest gear.
Boost vs. Non-Boost
We offer 3 standard size chainrings for ÿding: 30/32/34 teeth. To accommodate both the so-called “boost” frames and the “normal” non-boost frames, each chainring comes in two variations. One for each type of frame.
The difference is where the chainline is. Chainline is the distance from the center of the bike to the center of the chain on the chainring. Imagine two parallel lines. One goes through the center of the bike frame – the other goes through the center of the chain on the chainring. The horizontal offset between these two lines is the chainline value.
Comparing a “Boost” frame to a “non-Boost” you will find a 3mm difference in chainline, which is what the “boost” chainrings compensate for by not being flat.

Mounting
Start by greasing the spindle before putting it spindle through the bottom bracket bearings. Please don’t smash your new power meter with a hammer to get it through the bearings. Be gentle. Often there is a small “wavy washer” that acts as a spring to take up any slack so the spindle will not move side to side in the bearings. This can go on either side of the frame.
If the frame is too narrow you may have to add spacers. They are available at your local bike shop and online. This indicates an unusual setup though, so make sure the chainline is not too weird. After putting the spindle through the bearings, the other arm is simply put on and tightened using an 8mm hex key (Allen key). Lastly, put on pedals and you are done – it’s really that easy.
App or head-unit?
The electronic module is capable of doing both Bluetooth Low Energy (BLE) and ANT+ at the same time on the 2.4GHz band. This makes it possible to have one BLE connection active and several ANT+ connections at the same time.
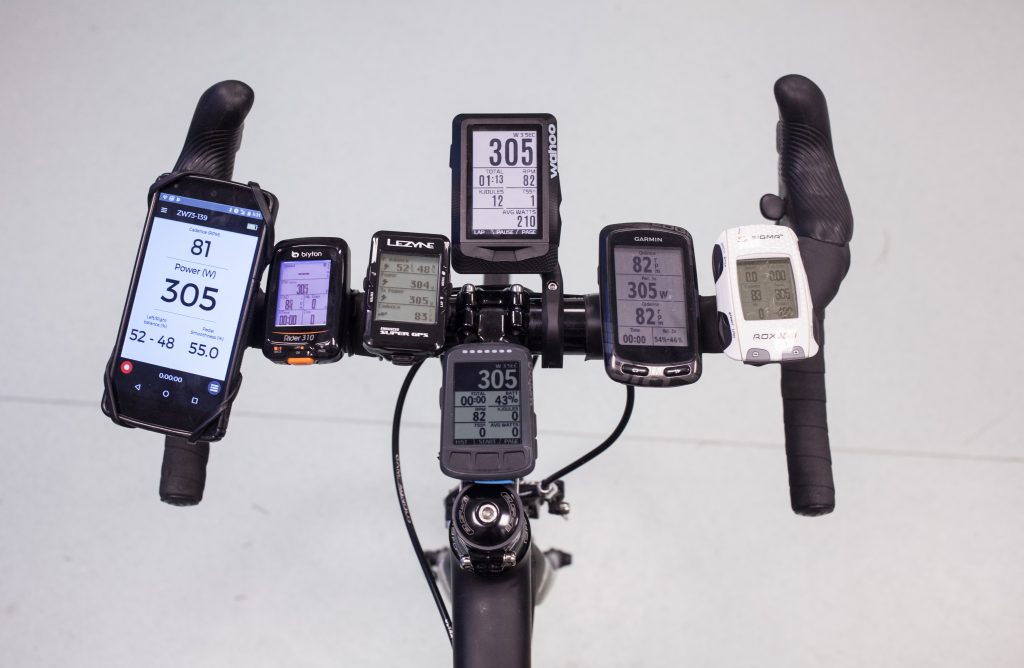
BLE is used by the smartphone app from Team ZWATT and a bunch of other apps including Strava, Zwift, Trainer Road, Sufferfest etc.
ANT+ is used by loads of different bike computer head units and sports watches from Garmin, Wahoo, Cateye, Polar, Lezyne, Bryton etc.
All of this is tested on a regular basis and all these companies are in direct contact to make sure things keep working with every firmware upgrade.
The Team ZWATT app can be downloaded for iOS and Android through the standard channels. Just search for “Team ZWATT” and you should find it easily.
Zero-calibrate
Before the first ride, you should make sure to calibrate the power meter. This is done through the app or your head unit. The purpose of the end-user calibration is similar to the “tare” function of a kitchen scale. This sets the zero-point. It’s important not to put any torque on the spindle while calibrating.
The power meter is crazy sensitive. The resolution is so good that even 20g on the pedal can be measured. Imagine that! Those 20g will twist the spindle enough that the sensitive electronics picks this up. Therefore we recommend the crankarm is in the up or down position while doing the calibration. Even the weight of crankarm and pedal is enough to offset the zero-calibration a bit.
While pedaling the power meter always calculates power based on full rotations, so the weight of the crank arm and pedal etc. is added on the way down and subtracted on the way up. All in all that is a big round zero. So we really don’t want the weight of the crankarm to be part of the calibration.
Calibration should be done again every time anything changes in the mechanical setup. When bolts are tightened, after a crash, after cargo transport etc. Even significant temperature changes can have an effect on the zero-calibration. We have found our technology to be superior to other competing (much more expensive) products, but there can be an effect. And the solution is to zero-calibrate. Takes a few seconds.
Too fast in Zwift?
As a side note: If you are going too fast in Zwift (great online multiplayer training platform, which is 100% compatible with ÿding and a nice way to make indoor training fun), you can always put a little forward torque on the left pedal when you zero calibrate. That will make all your power readings a bit lower so your friends can keep up with you 🙂 We are deliberately not telling you how to cheat as that is frowned upon in the Zwift community, but now you know one of the many ways cheating could, in theory, be done by evil Zwift users.
Flight mode
When moving the bike on a plane or a longer transport of some sort, there is the risk that the power meter turns on and slowly discharges the battery. Not a big risk, but it’s there and we have the solution.
The app will allow you to put the power meter in “flight mode”. This effectively turns off the power meter until the charger is plugged in. The normal spin-crank-to-turn-on mechanism is disabled in flight mode, so no matter how you rotate/spin/shake the crank during transport nothing will happen. Now, don’t forget to bring that power bank or charger on your trip!
Always use flight mode when taking the bike on a plane as you don’t want the radio to turn on and be picked up by some security check.
Firmware
Any time we find a reason to improve on the algorithms or inner workings of the power meter, we release that as a firmware update. The app will show a blue dot and you can update the power meter directly from the app (YouTube). This is a swift process and it’s always good practice to stay up to date.
An overview of the latest and greatest firmware updates is available online. The app will allow you to roll back at any time, in case you for some reason do not want to run the latest firmware.
Test ride
Having done so much testing on these type of products over the last 3+ years, it would be easy to dive down and pick a “perfect” test ride. Instead here is a random and quite realistic indoor test data set showing how this tracks against a two-sided pedal-based power meter costing 3-4x as much. This is for some testing we did back at the end of October 2018.
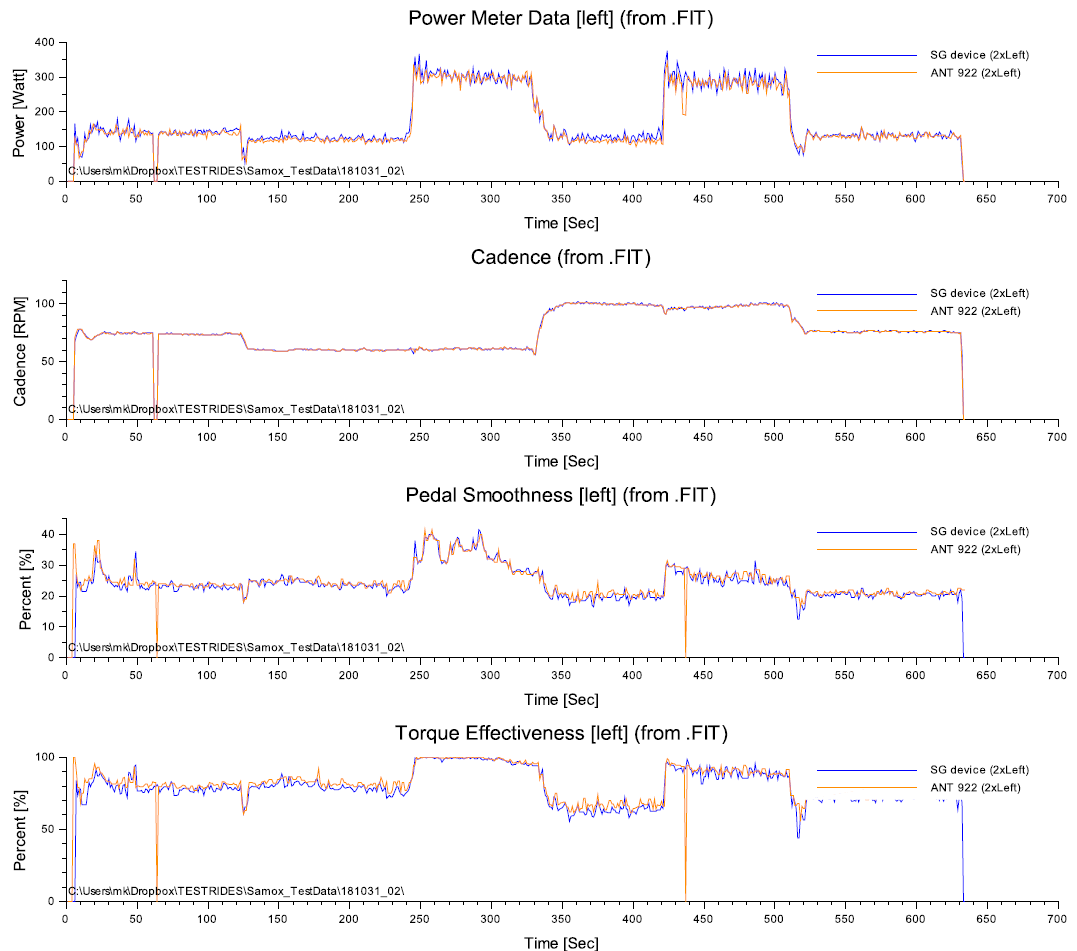
This also shows the 4 measures coming out of the power meter through the ANT+ connection to your head unit. Power and cadence is there – no need for a separate cadence sensor anymore. You also get Pedal Smoothness and Torque Effectiveness. Those metrics can help you with the pedaling style. PS is about how even you keep the torque on the spindle over a full rotation. TE is showing more about how good you are at pulling up the foot in the up-phase of the pedal stroke.
What to look for?
Comparing power meters is an art and you are never going to get this 100% the same no matter how you do it given where the technology is today. We believe the accuracy is plenty good as it is – and so does the brands that use this technology after endless pro-level testing. The more important things to focus on for an MTB power meter is the ability to ignore vibrations. We started to do this kind of testing back in 2016 (YouTube) when we discovered how other power meters would “spike” and show crazy high power (YouTube) in places with hardly any pedaling going on.
We think we got that working to world-class level today and the algorithms used for this are constantly updated using the latest knowledge and data collected. In fact, the app will allow you to record and upload a ride with so much extra information that we can re-run your exact ride with any algorithmic improvements we make. See something wonky going on? Just let us know and we can fix it.
The name ÿding?
So where does the name ÿding come from?
Simple – the highest point in Denmark where the technology was developed is Yding Skovhøj (here is how to pronounce it in Danish). So even though this is only 172.5m above sea level it is the highest point and we wanted to honor this “peak”, so ÿding is the name. The ÿ is not a character used in any major language, so we threw those two dots in for the fun of it to make it truly unique.
Yding Skovhøj really is not much of a peak, as you can read more about on Wikipedia, but it’s there and it is the highest point in the very flat country of Denmark. Actually, there is a lot of discussion about what is really the highest point, but I guess we are no different than the several “largest power meter stores” you can find online or the many “worlds longest beach” found around the world.
Tell me more
If you want to learn more about ÿding and how this can be your next MTB crankset, go to the ÿding page with all the specs.
Dealer, Distributor or OEM?
We are actively looking for the best ways to get this out on the market right now, so if you are a first-mover and interested in this. Get in touch by email to the support email hello@teamzwatt.com. We would love to talk to you.
SHARE


READ ON!
Related Articles
Guest post: Training is more than just averages
I am often asked what the most important aspects of performance data are for MTB racing and training. My answer is always, “all of it.” Back […]
Guest post: Why nobody spends on MTB power meters?
During the last several weeks, I’ve been to a ton of races in North America. It’s winter now in New Zealand, so I took one of […]
Guest post: ÿding, first impressions
We have sent one ÿding power meter to our good friend Matt Miller – who is the worlds first PhD in mountain biking – to share his […]